Photography for the patient - how to take a good photograph of a skin condition / skin lesion
LAST UPDATED: Jan 20, 2021
Acknowledgements: I would like to thank Dr Chin Whybrew for writing this chapter
Introduction
This chapter on photography for the patient is set out as follows:
Management
Getting ready
-
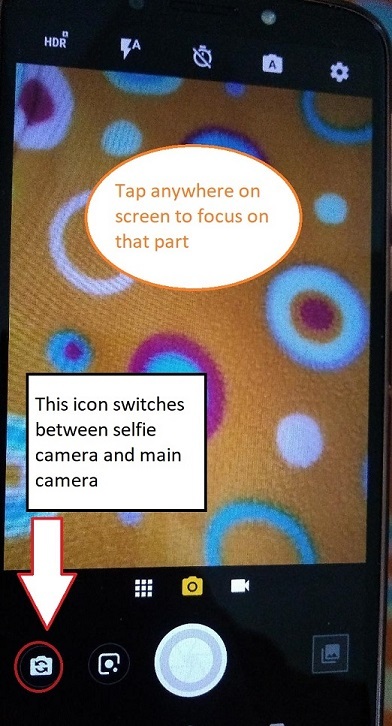
You can use a phone camera or digital camera. If using a phone use the main camera not the “selfie” camera. The icon to switch between the two is shown in figure 1
-
Find an assistant - it’s much better if someone else takes the photo
-
Check that your camera lens is clean
-
Move to a bright area with lots of natural light, but avoid direct sunlight. Turn off the flash. A flash can light up the skin unevenly (figure 2)
-
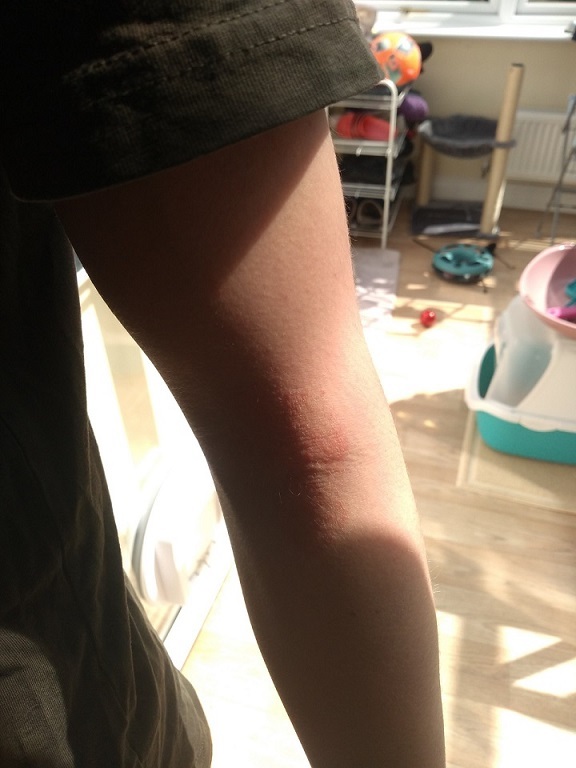
Make sure the light is shining onto the skin, and that your assistant doesn’t cast a shadow over the area being photographed. Figure 3 with the light source behind, the detail is lost. Figure 4 the light source is shining on the skin, with no shadows
-
Place the area to be photographed on a plain background (such as a plain towel, sheet or wall) if possible - ideally this should be a neutral colour (eg grey or light blue) as a white background can cause the photograph to be too dark, and a black background can cause the photograph to be too light
-
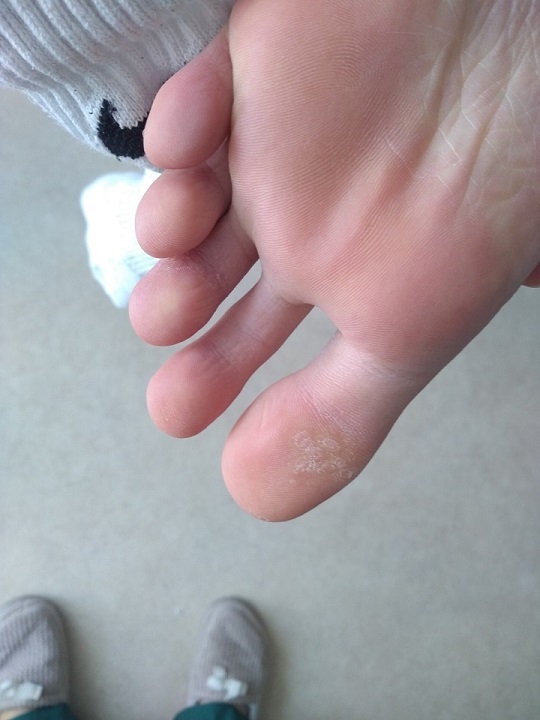
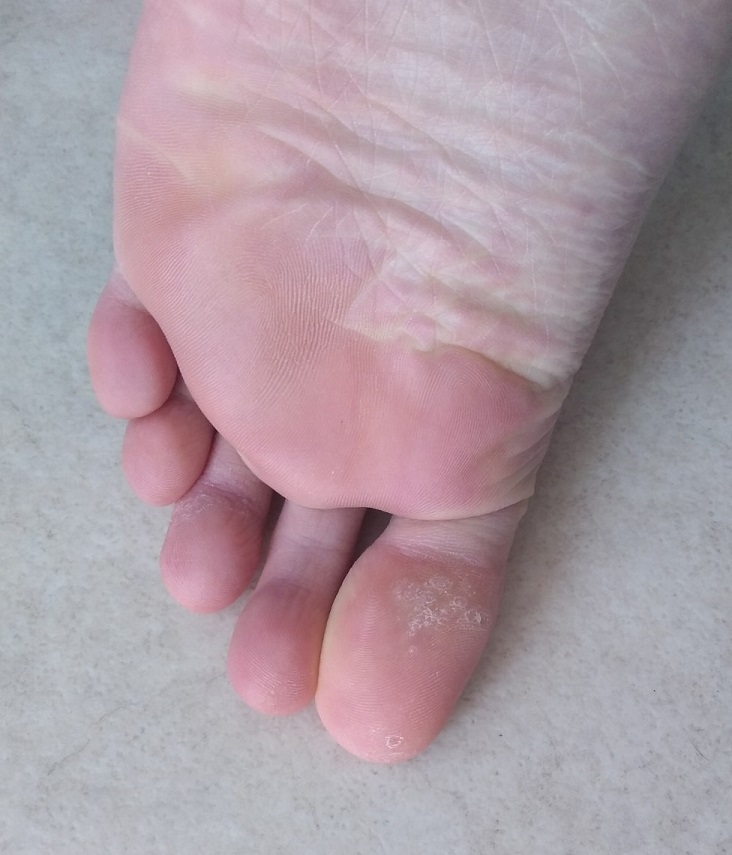
Make sure the area to be photographed is held still, ideally by resting it on a surface (figure 5) and trying to hold still. Resting a foot on the floor makes it much easier to focus (figure 6)
Taking the photo
-
We need at least 2 photos for each lesion.
-
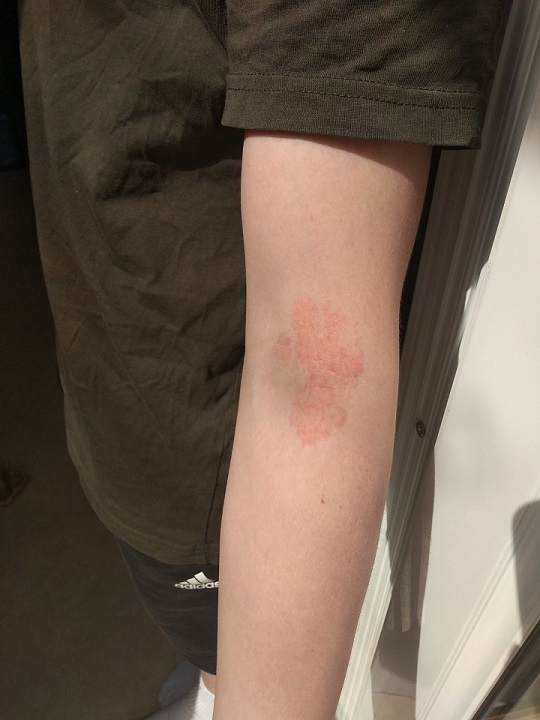
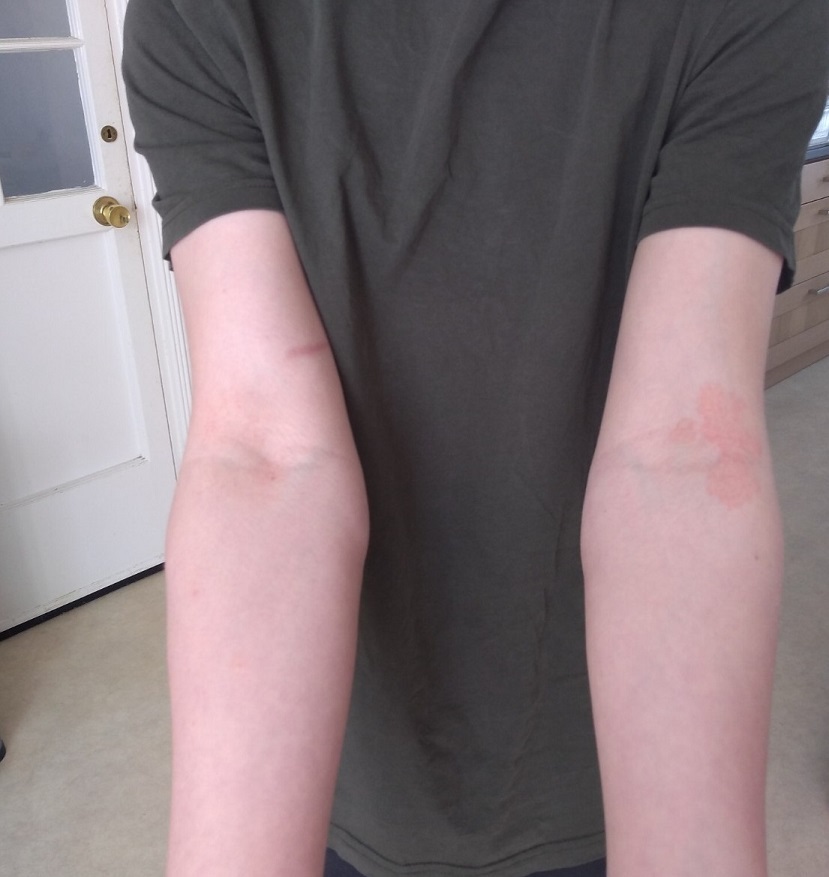
An orientation photo - stand 1 metre away from the area of interest and take the photo. This shows where the problem is and how big an area it covers. Try to show the whole area affected if it is a rash, including both sides of the body if possible - by showing both elbows (figure 7) we can see that the rash only affects one side
-
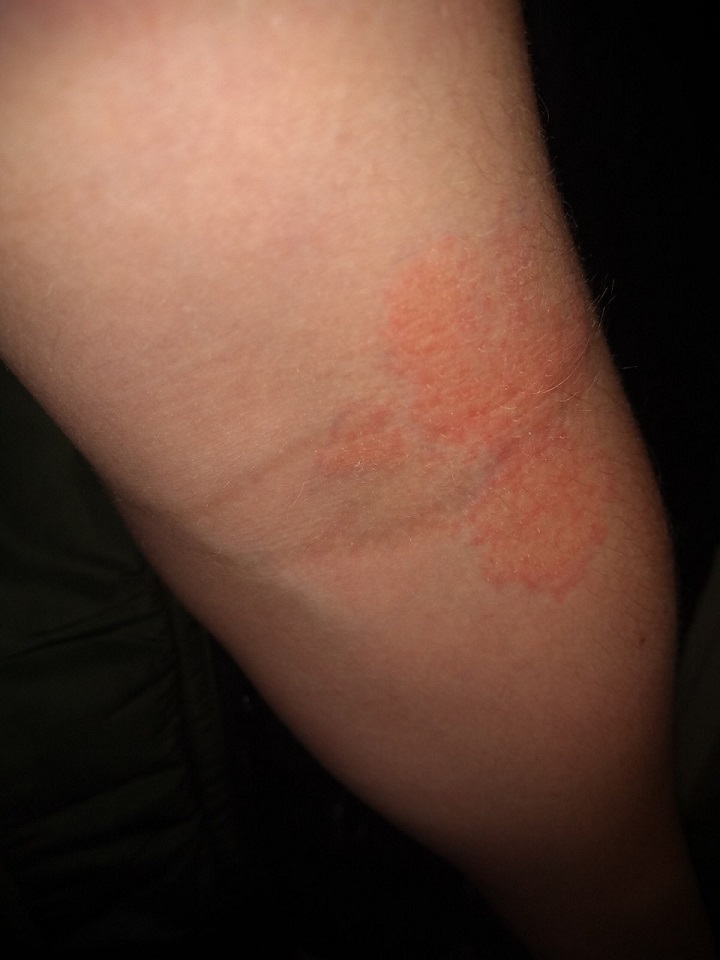
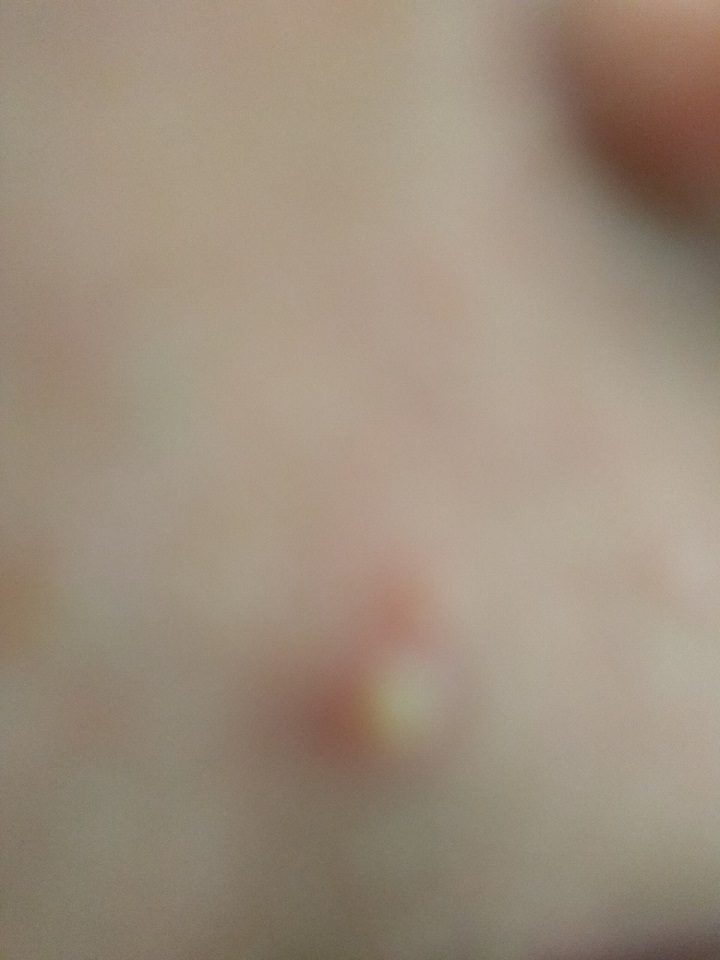
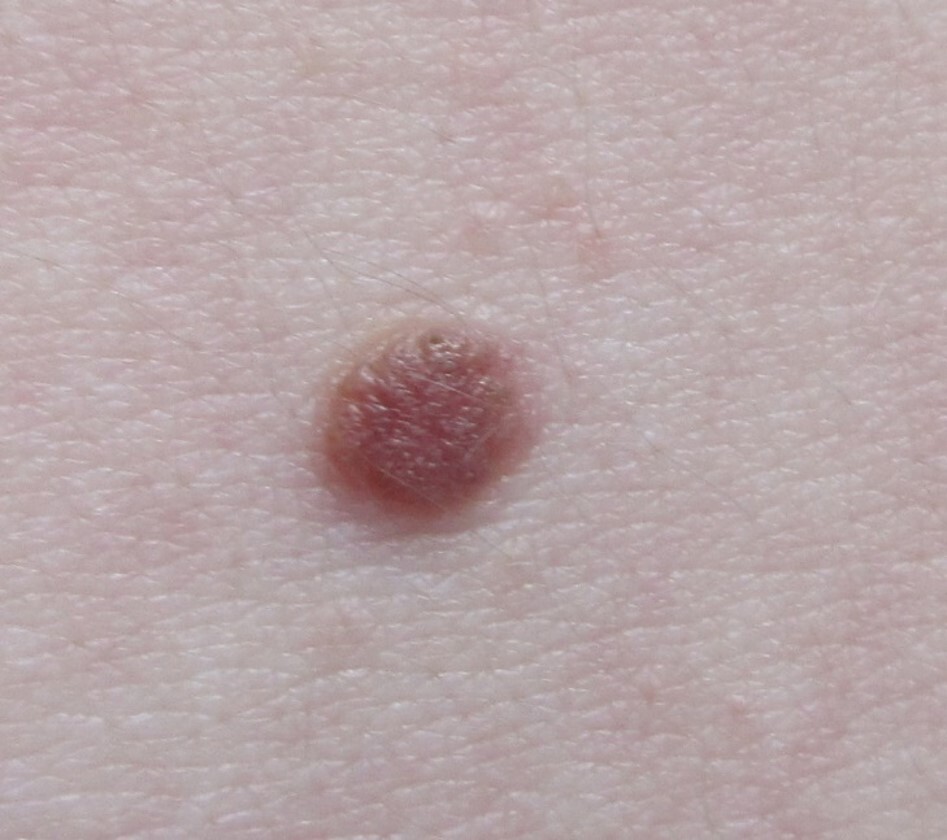
A close-up photo - move your camera 10-12cm (4-5in) from the skin problem. On most phones you can touch the part of the screen you want the camera to focus on. If you get too close the camera won’t be able to focus. The focus is the most important thing - don’t worry about getting really close, as close as you can get in order to achieve a sharp focus is all you need. For the close up photo it is often better to have the light source coming slightly from the side, to highlight any change in skin texture. In figure 8 the camera is too close to the skin to focus on the lesion. In figure 9 the light coming from the side lets you see the surface of the lesion much better
-
A sideways on photo for a raised lesion - if the lesion is raised then a sideways on photo can be very helpful
-
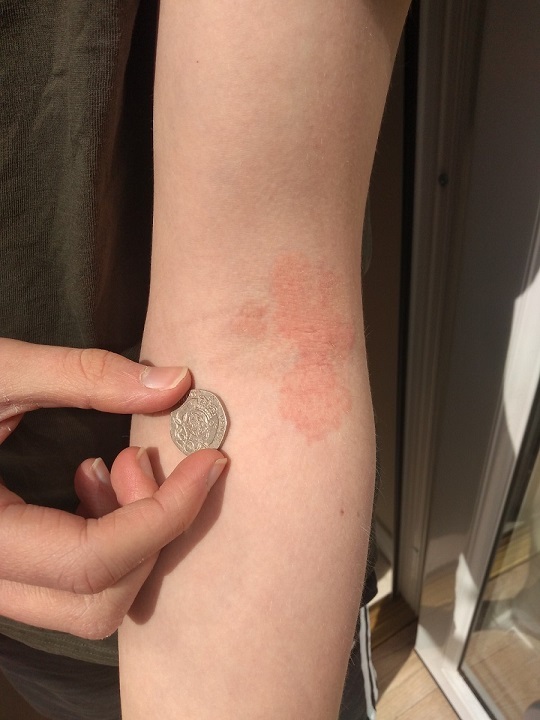
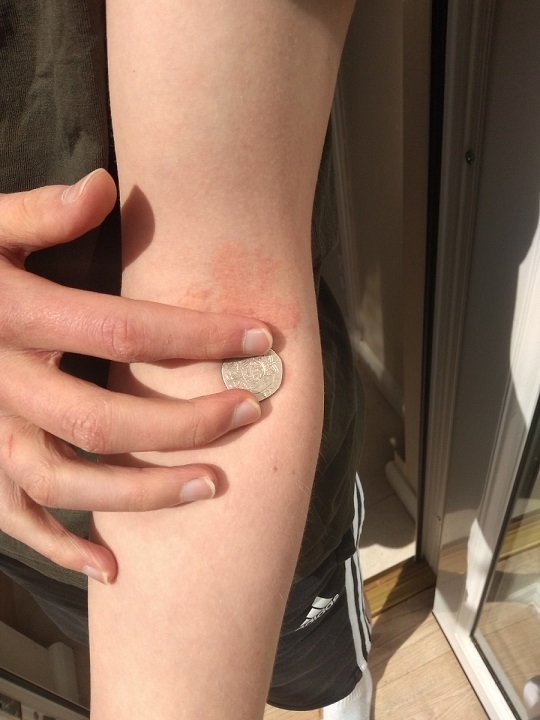
Make sure the size of a skin lesion is clear either by putting a coin or ruler in the photo (figure 10), or by taking the photo from a little further away. Don’t cover up the lesion with the coin (figure 11)
-
Take a few photos and only send the best. Check that the image/s are in focus and easy to see. The skin lesion or rash needs to look the same on the screen as it does in real life. If you are only able to send one photo of a skin lesion, then a close up photo is best
Sending the photo
-
Only send the best photos of each skin lesion/rash, as above
-
If given the option reduce the image file size to between 500Kb and 1Mb
-
Make sure you have put your name and date of birth into the email message or online platform (this is not necessary if you are sending the photos as a reply to a text message)
-
By sending the photo to the clinician you must be aware that no communication system can guarantee complete security and there is a small possibility that the message could be intercepted by a third party - please do not send photos of intimate areas
-
It is usual for all photos to be stored in your medical records - if you do not want for any photo to be stored in your record then you should speak to the clinician BEFORE sending any pictures
Additional images
Disclaimer - the author PCDS cannot accept responsibility for any misleading or incorrect statements, and the management of individual patients remains the direct responsibility of the individual doctor. We do however hope that visitors to this site can contact us regarding comments that are considered misleading or incorrect so that we can continue to improve the site.
Image Rights - The PCDS would like to thank Dermatoweb, DermQuest (Galderma), and others who have contributed images. All named individuals and organisations maintain copyright for the relevant images.